How to Build an Altar: Part 1
Most descriptions of magickal altars describe what goes on them. They advise that you use a box, a small table, or just about anything, then cover it with a cloth and put all of your ritual items on it.
The ceremonial magick altar is different. Often, it will have no cloth cover at all. The design and shape of the altar, however, is fairly specific. Let’s look at why:
- It is a double cube. The reason for this is simple. When you form a magickal circle, you literally become a small version of the universe within the circle. The two cubes represent all things: the smaller (microcosm) and the greater (macrocosm). They also remind us of the principle, “as above, so below.” What we magickally create in ritual (above) should manifest physically (below).
- When two cubes are placed together, the sides that meet cannot be seen. Therefore, the cube placed above shows five sides (four on the outside and one on top) and the cube at the bottom also shows five sides (four on the outside and one on the bottom). This totals ten, the number of Sephiroht on the Tree of Life. Thus, the double cube represents the entire Tree and everything it represents.
- Traditionally, the altar is painted black. This is not to represent darkness or “evil.” Rather, it indicates that even the greatest amount of light in our universe is dim when compared to the greater light from the Divine.
Traditionally, the altar comes up to your navel. Most magickians I’ve seen don’t limit themselves to this. I’ve found that a good size is about 36″ tall, meaning that your altar can consist of two 18″ cubes placed on top of each other. Larger than this becomes too tall and cumbersome. Much smaller doesn’t give a great deal of room on the top of your altar for your tools.
Easy Construction
Rather than trying to size all of the pieces and assemble them, I’ve found that the easiest way to make an altar is to go to a store that sells unfinished or “nude” furniture. They usually have pre-made cubes for sale. Here’s an example:
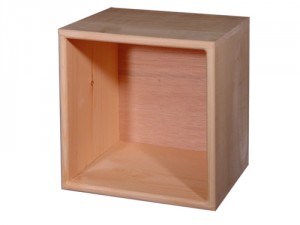 As a general rule, the more expensive it is, the better the wood and the easier it will be to paint. The cheapest ones are made of wood pulp and chips that are glued together. There’s nothing wrong with using the cheap ones, but they literally drink up paint and will require undercoating and several coats of black paint. You will need two cubes and black paint. Be aware, too, that some stores sell “cubes” that are not really cubes! What you want is a true cube, one that is the same breadth, width and height.
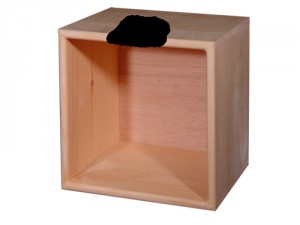
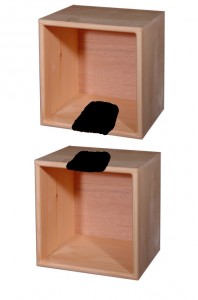
An altar can also be used to store your magickal items when they are not in use. Some items—wands and swords—can be too long to fit in one cube. So saw a U-shaped cut in one side of each of the cubes:
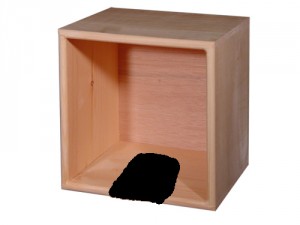
<— Bottom Cube
…………………….Top Cube—>
The next step is to attach them on top of each other. Make sure all sides line up. I prefer using screws (or drilling holes and using nuts and bolts) because it’s difficult to get a good swing with a hammer if you use nails. Plus, the force used to drive the nails can move the cubes out of alignment. The cut outs should match each other:
 After they are assembled into one unit, paint everything black. You may wish to use an undercoat first. Several light coats are better than one heavy coat (that drips). And yes, I know that nobody will see the bottom, but unless you paint it you’ll know it’s not finished. So be sure to paint the bottom, too. Follow the directions that come with the paint. You can use flat black, satin black, or glossy black, just so long as it’s black. My preference at this stage of assembly is flat black.
Part 2 of the assembly next time!


[…] How to Build an Altar: Part 1 How to Build an Altar: Part […]
[…] This website describes how to make the ideal altar for ceremonial magick. The ideal construction is of two cubes, stacked one-atop-another in an “as above, so below” configuration. Painted black, of course. […]