How to Build an Altar: Part 2
Okay, you’ve assembled your two cubes and painted them black. Read part one if you don’t know what I’m talking about. The next step is to add a door. I can’t tell you the appropriate size because it will depend upon how thick the walls of your cubes are. Measure the height and width of the open side of your altar. Be sure to measure in a couple of locations because the cubes may not be perfect. Remember the carpenter’s motto:
measure twice, cut once.
Your local lumber yard can cut a board to size for you. I suggest using plywood at least 3/8″ thick. If you go much thinner the door may warp. The choice of hinges is up to you. You might prefer “invisible” hinges (they’re completely on the inside of your cabinet) or decorative one. I choose decorative ones for my current altar. I also use magnetic latches to keep the door closed and a door pull that’s shaped like a lion’s head.
Finish the assembly and paint the door black to match the rest of the altar. Remember, use several light coats rather than one heavy coat as a heavy coat is likely to drip. Be sure to coat around the edges and the inside of the door. This will help prevent warping.
Finishing Touches
There are just a few things left to finish your altar:
- Wheels. I suggest attaching wheels or “shephard casters” to the bottom of your altar. Wheels
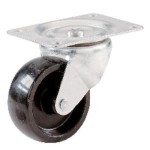 under 2″ in size may not be strong enough to support your altar. Wheels make it easy to move around. If you prefer, there are exceedingly slick pieces of plastic often called “furniture sliders” that can be glued to the bottom of your altar. Larger sizes tend to be more effective than smaller ones. This may be especially useful for people who are shorter and who find a taller altar uncomfortable to use.
- Fabric Interior. I used some fabric to cover both the bottom of the lower and upper cubes. This allows you to keep items more safely within the altar, especially when you move it. I also glued thick fabric around the “U” cut out so that longer wands do not get scratched when placed in the altar.
- Glossy Top. Sooner or later you are going to spill something on your altar. It happens, especially in a darkened temple. I suggest painting your altar flat black or satin black so it doesn’t reflect various lights and draw your attention away from your magickal work. However, surfaces covered with a flat paint tend to be difficult to clean. Since it is the top that is most likely to catch spills of wine, foods, and worst of all, melted wax, the top, out of necessity, needs to be different. I suggest using a glossy coating made of several layers. Use a glossy polyurethane coating on top of the paint. Make sure you use a brand that dries clear and doesn’t yellow. You may have to lightly sand between coats with a very fine grit sandpaper. Follow the directions. Alternatively, you may wish to put a piece of glass on top of your altar. Have it cut to size and handle with extreme care. You may want to attach some L-shaped brackets to each corner to prevent the glass from moving around or falling off. This glass does not need to be very thick.
Final Notes
Yes, I realize that adding a door will make the cubes slightly bigger on one side and adding wheels (or even the very thin furniture sliders) will make it taller than a perfect double cube. In my experience the slight difference is unnoticeable, especially in a darkened room.
What I’ve described is a traditional altar. This does not mean your must be that way or it will be “wrong.” If you make your ceremonial magick altar in another way it will simply be different, not wrong.
- The first altar I made using this design was donated to a Golden Dawn type of group. I had painted it white to represent the pure spiritual light. On one side I decoupaged (glued and then covered with a clear coat) a poster of the tree of life. On the top I decoupaged a Solmonic pentagram. I used it that way for many years. They cover it with a black cloth.
- I’ve seen one altar where the top cube was painted white and the bottom cube was painted black.
- I’ve seen one altar that was larger and had horns at the corners, matching the design described of the altar in the original Temple in Jerusalem.
In short, if you don’t like the traditional all-black design, try something that is meaningful to you.
Have you made your own altar? Describe it in the comments here.


I haven’t completed my Altar yet, But I found this old table, it’s a corner table, shaped like a trangle. I have been trying to think of something creative to do with it, that represents me and my Magick within, I am a beginner, I am studying Mr. KRAIG’S MODERN MAGICK BOOK! I did want to make the Altar taller, since I am only 5’1. So I think the wheels are a great idea and have a bunch of those kind of wheels! Thankyou Mr. KRAIG! Love your book! I very much enjoy reading the Articles and Blogs on LLewellyn! I aquire alot of interesting knowledge from the site! A True Fan, Carolee Haynie
I have shared the altar articles on my own blog where readers will be directed to this page to read them. This is one of the finest places I have found to direct people to not only for great articles but to find the best in Wiccan/Pagan books. I hope that many who read the article will go on to get the book. These are great instructions for building an altar and love the wheels!!!
I am very new, very in awe, and very confused about the Craft. I’ve been trying to pick an altar for weeks from antiques and after reading this I would like to at least attempt to make my own. Thank you for reminding me there is no wrong or right and that my positive intentions are enough for my chosen pantheon. I’m sorry they covered your beautiful work with a black cloth, even if it is each to their own.
In your opinion, would there be anything wrong with making the altar as one unit being 18″x18″x36″?
Thank you for this helpful article! I just found this amazing site. It feels amazing to be connected with this tribe of like minded seekers.
For the highest good of all concerned